Publish
Publish is the final desktop stage. Use it to build the generated site, inspect the result, choose a deployment target, and follow the deployment status to the end.
What this stage is for
Publish is where you:
generate the site from the current project state
check the built preview
pick a deployment target
review logs and the final result
This stage comes after site.md.
1. Build and inspect the generated site
Before deploying, generate the site and check the built preview inside the app.
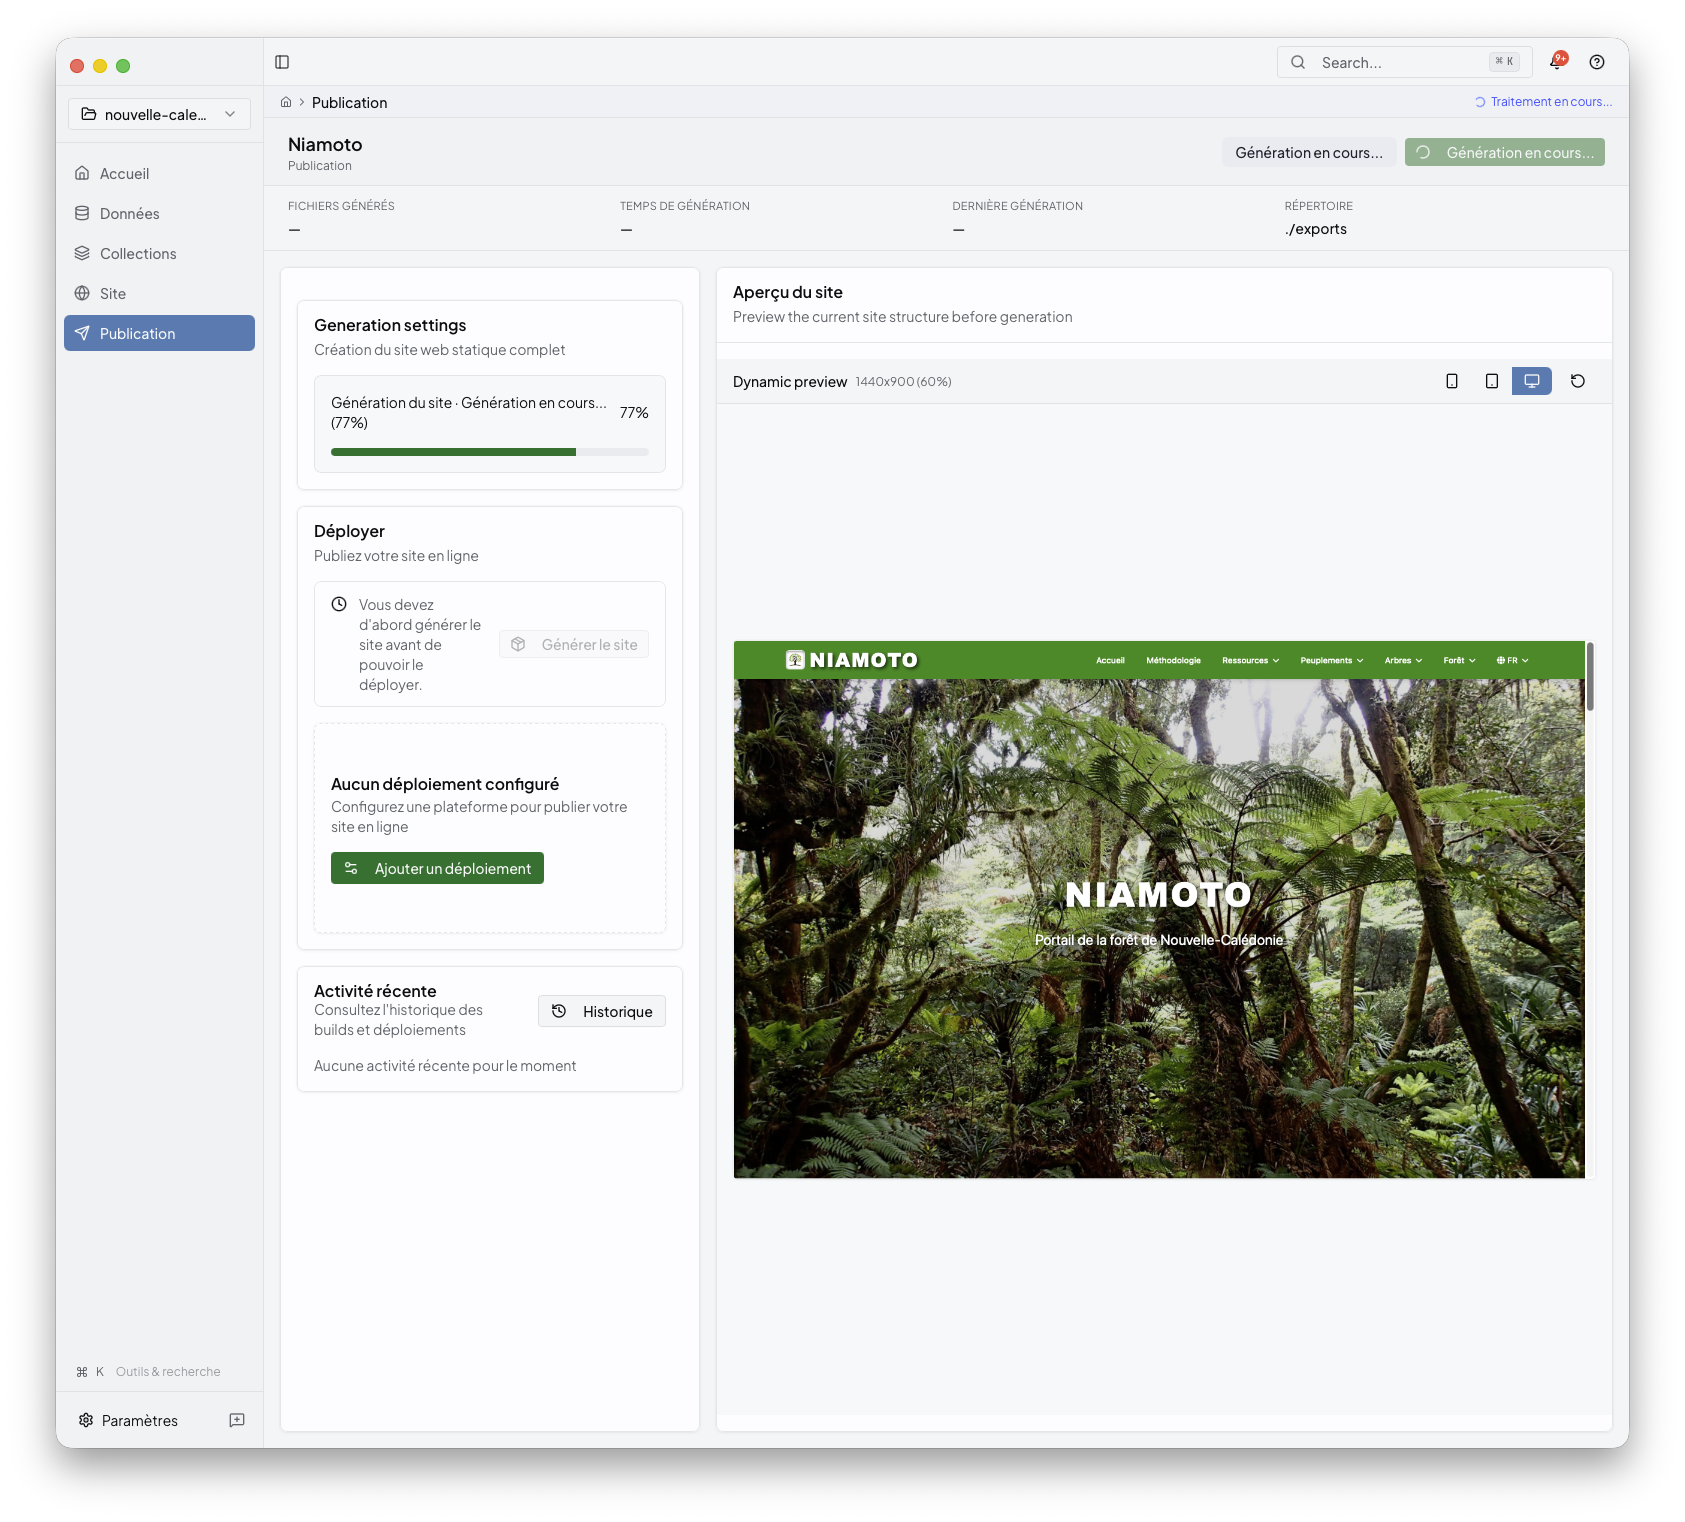
This is the best checkpoint for deciding whether you should publish now or go back to Site or Collections for another adjustment.
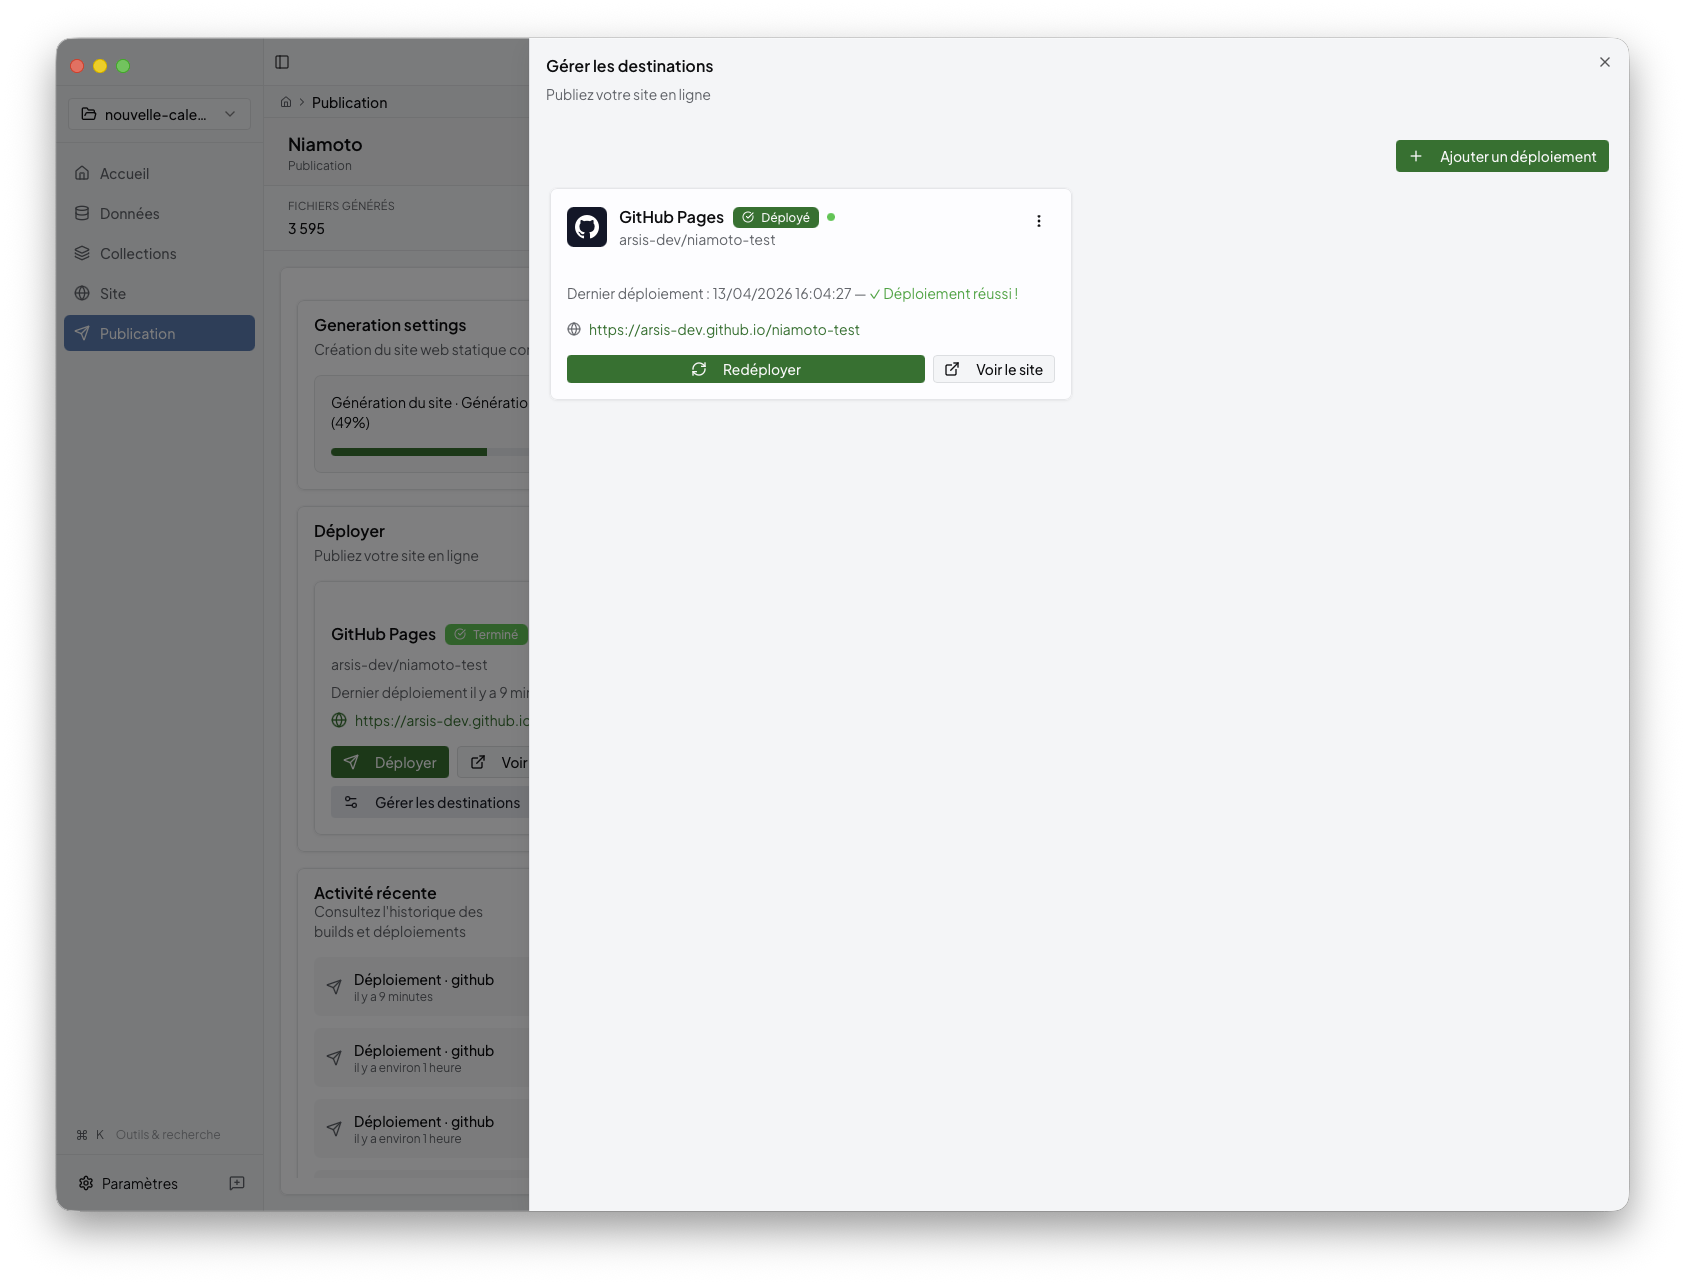
2. Choose a deployment target
When the generated preview looks right, select the destination that should receive the site.
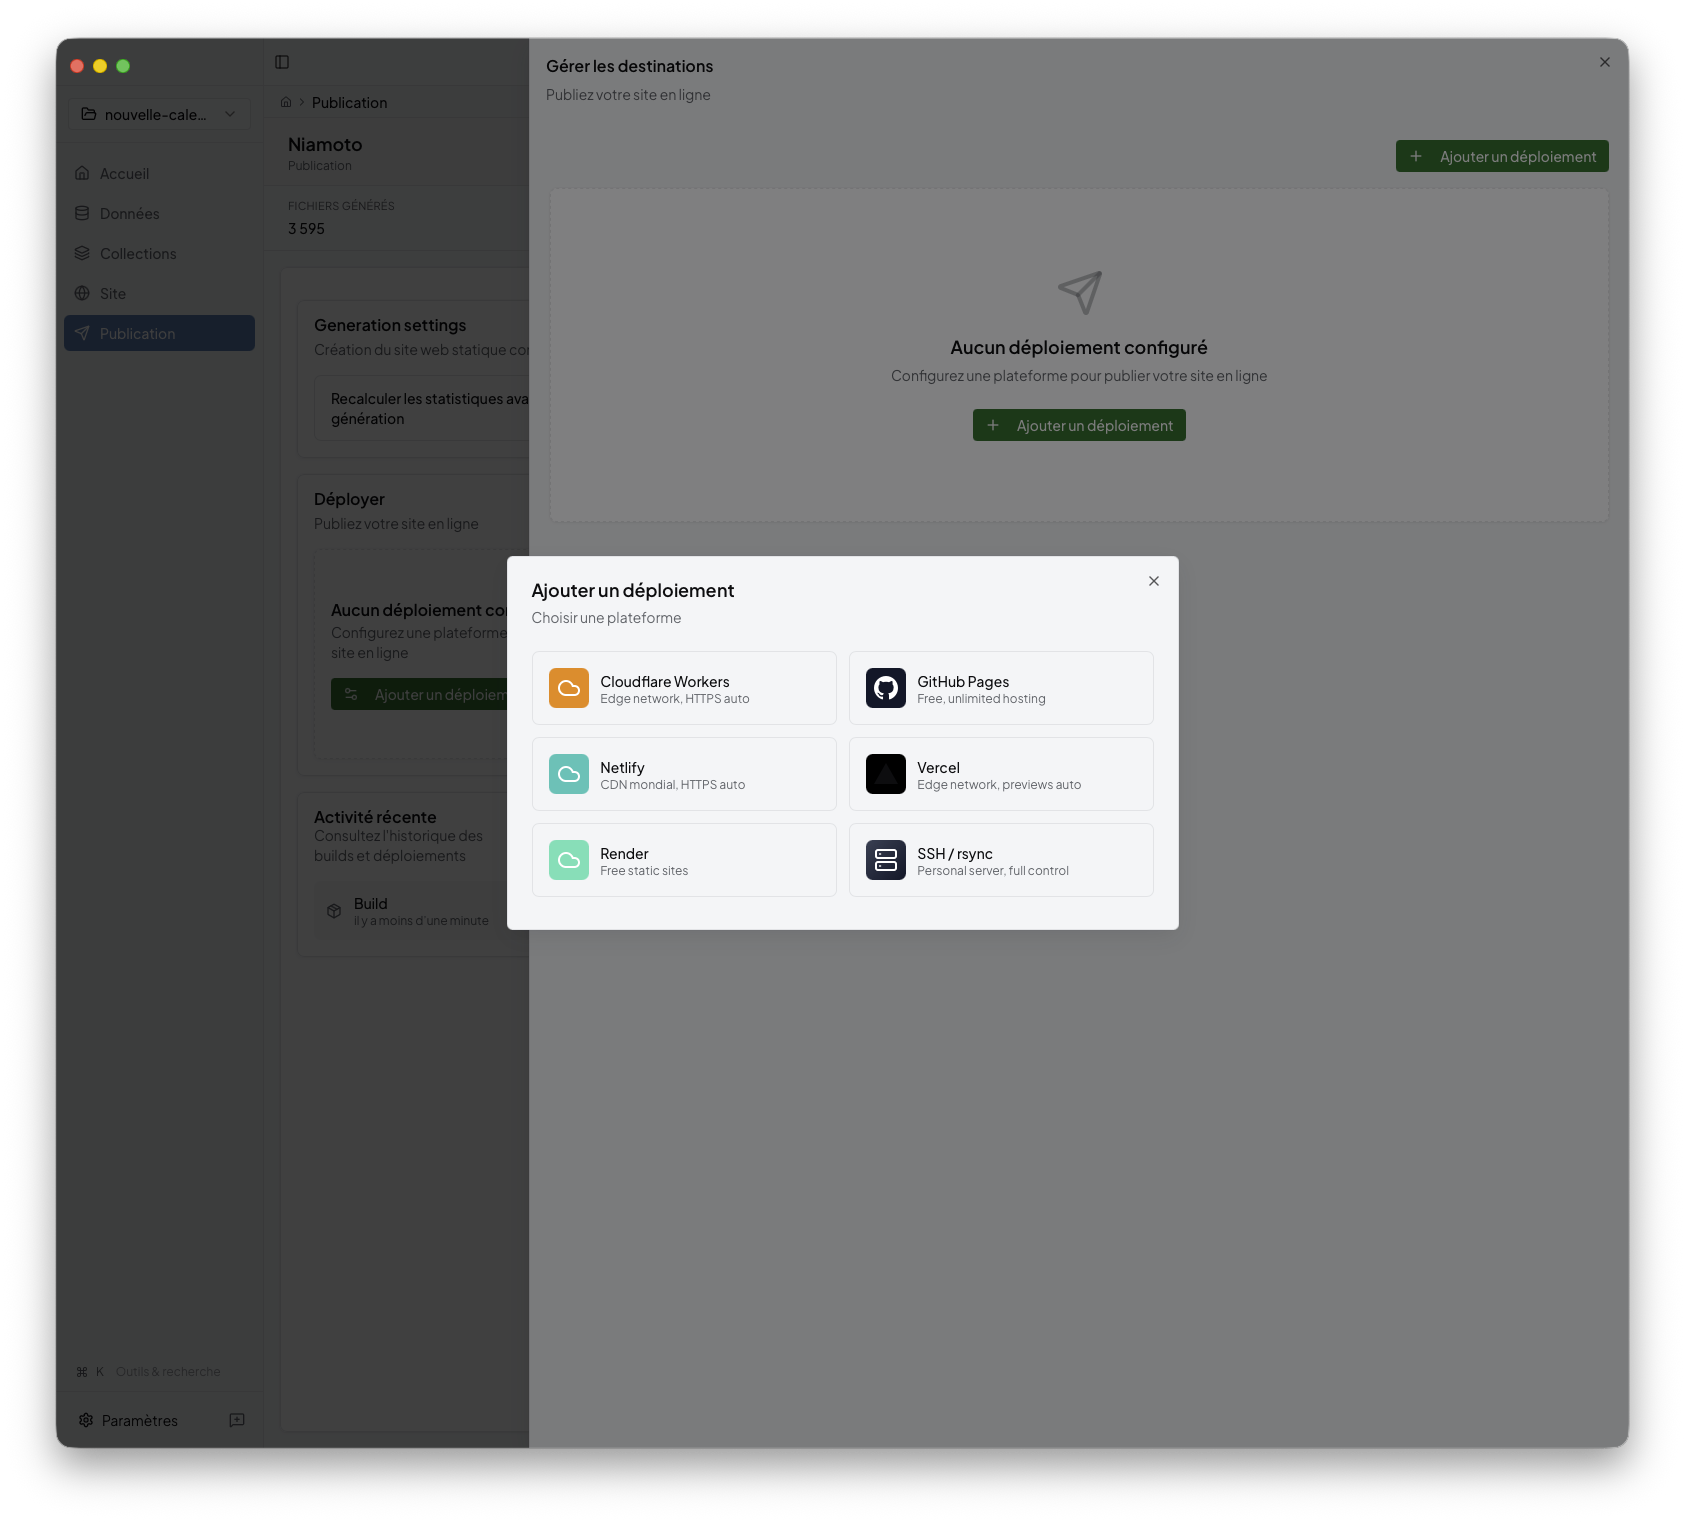
The current desktop product exposes these publish destinations:
Cloudflare Workers
GitHub Pages
Netlify
Vercel
Render
SSH / rsync
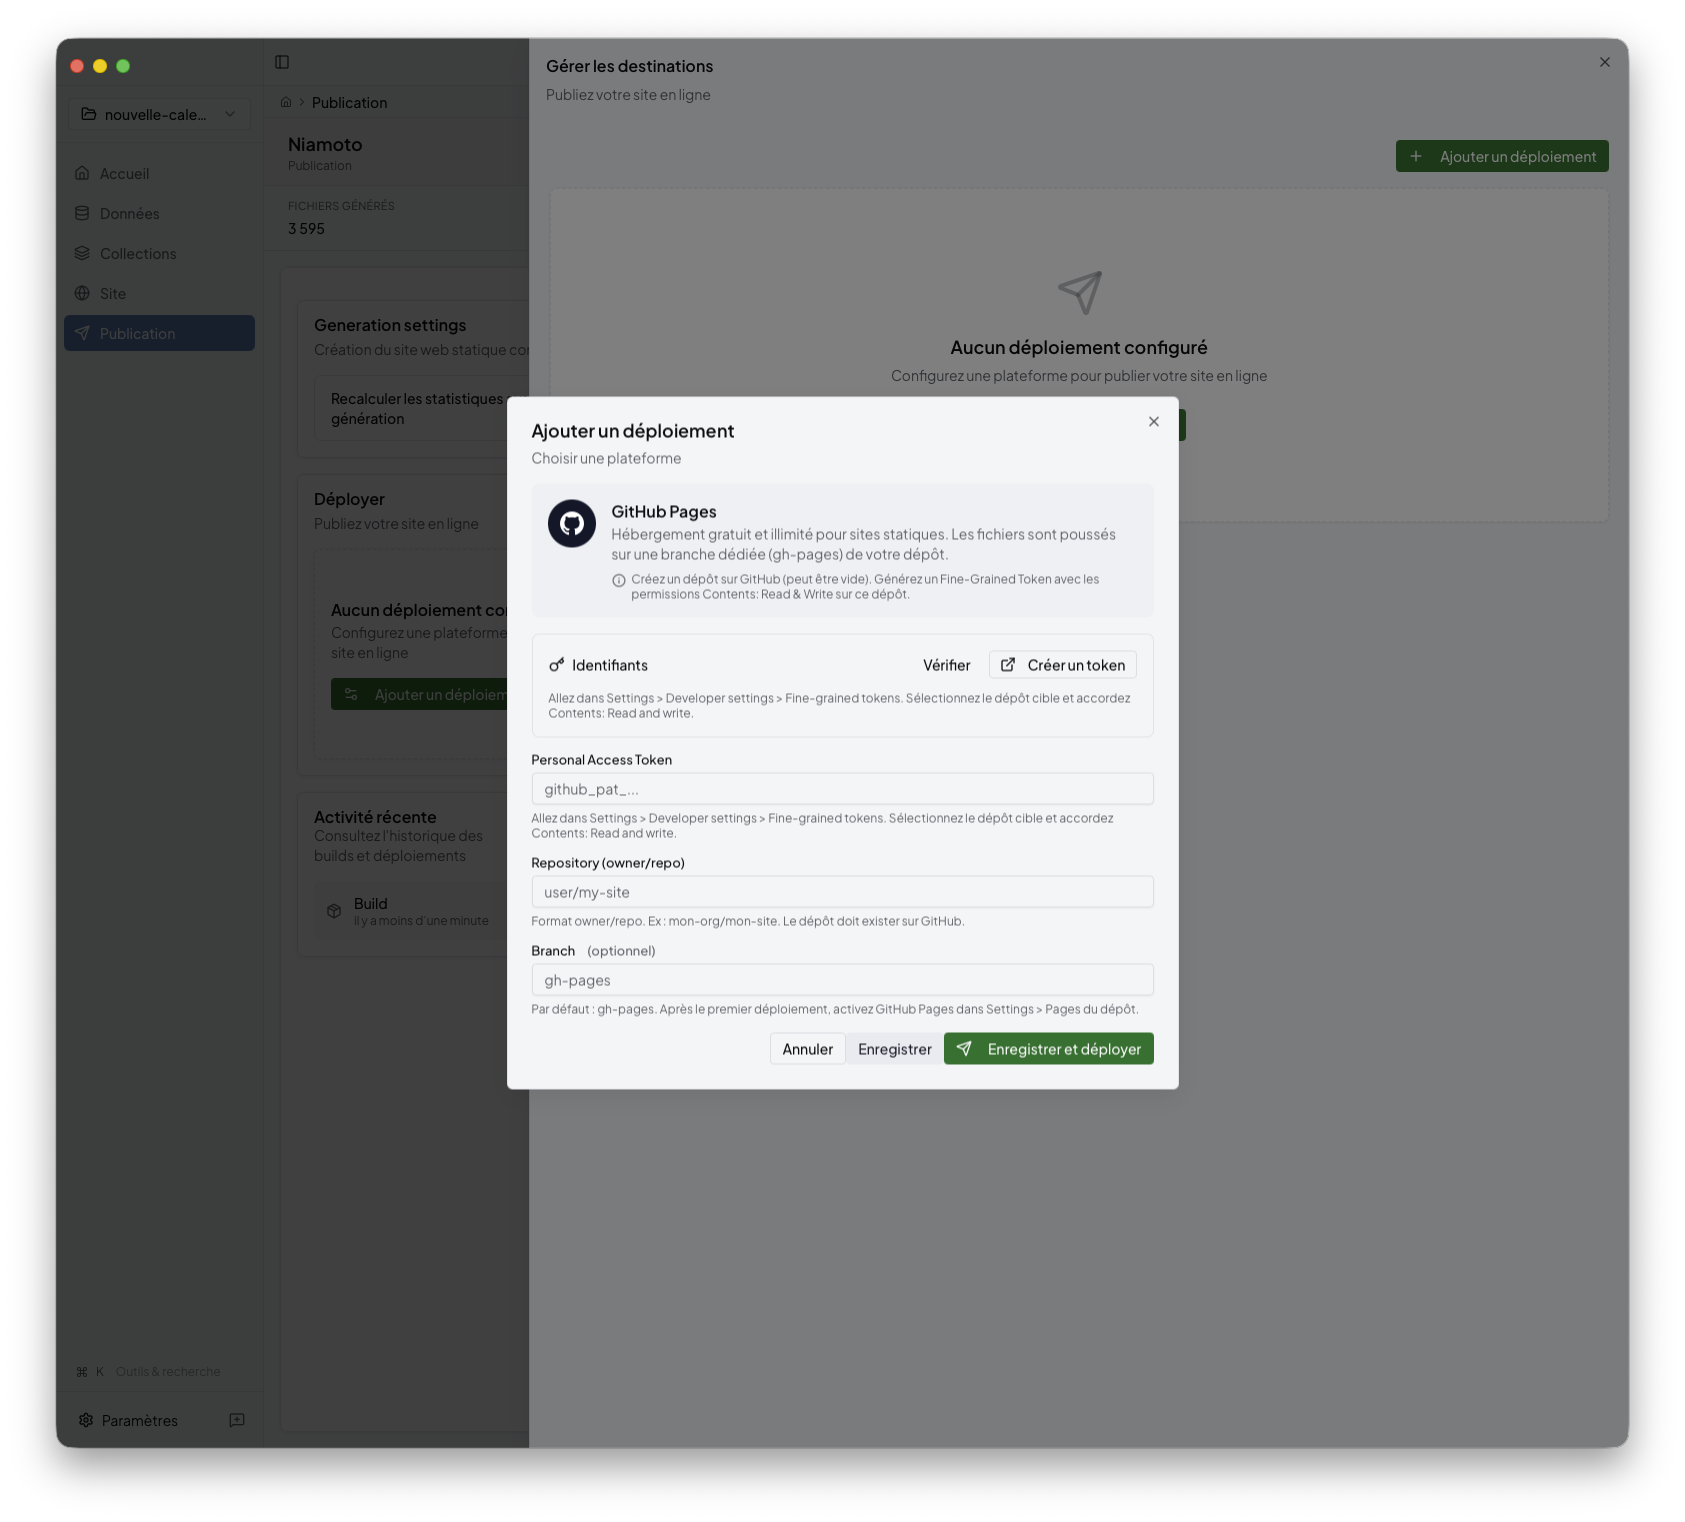
3. Fill in provider settings
Each destination has its own configuration surface. For example, GitHub Pages asks for the repository-oriented settings needed to publish the built output.
4. Review logs and final status
Publish keeps the build and deployment lifecycle visible while the job runs.
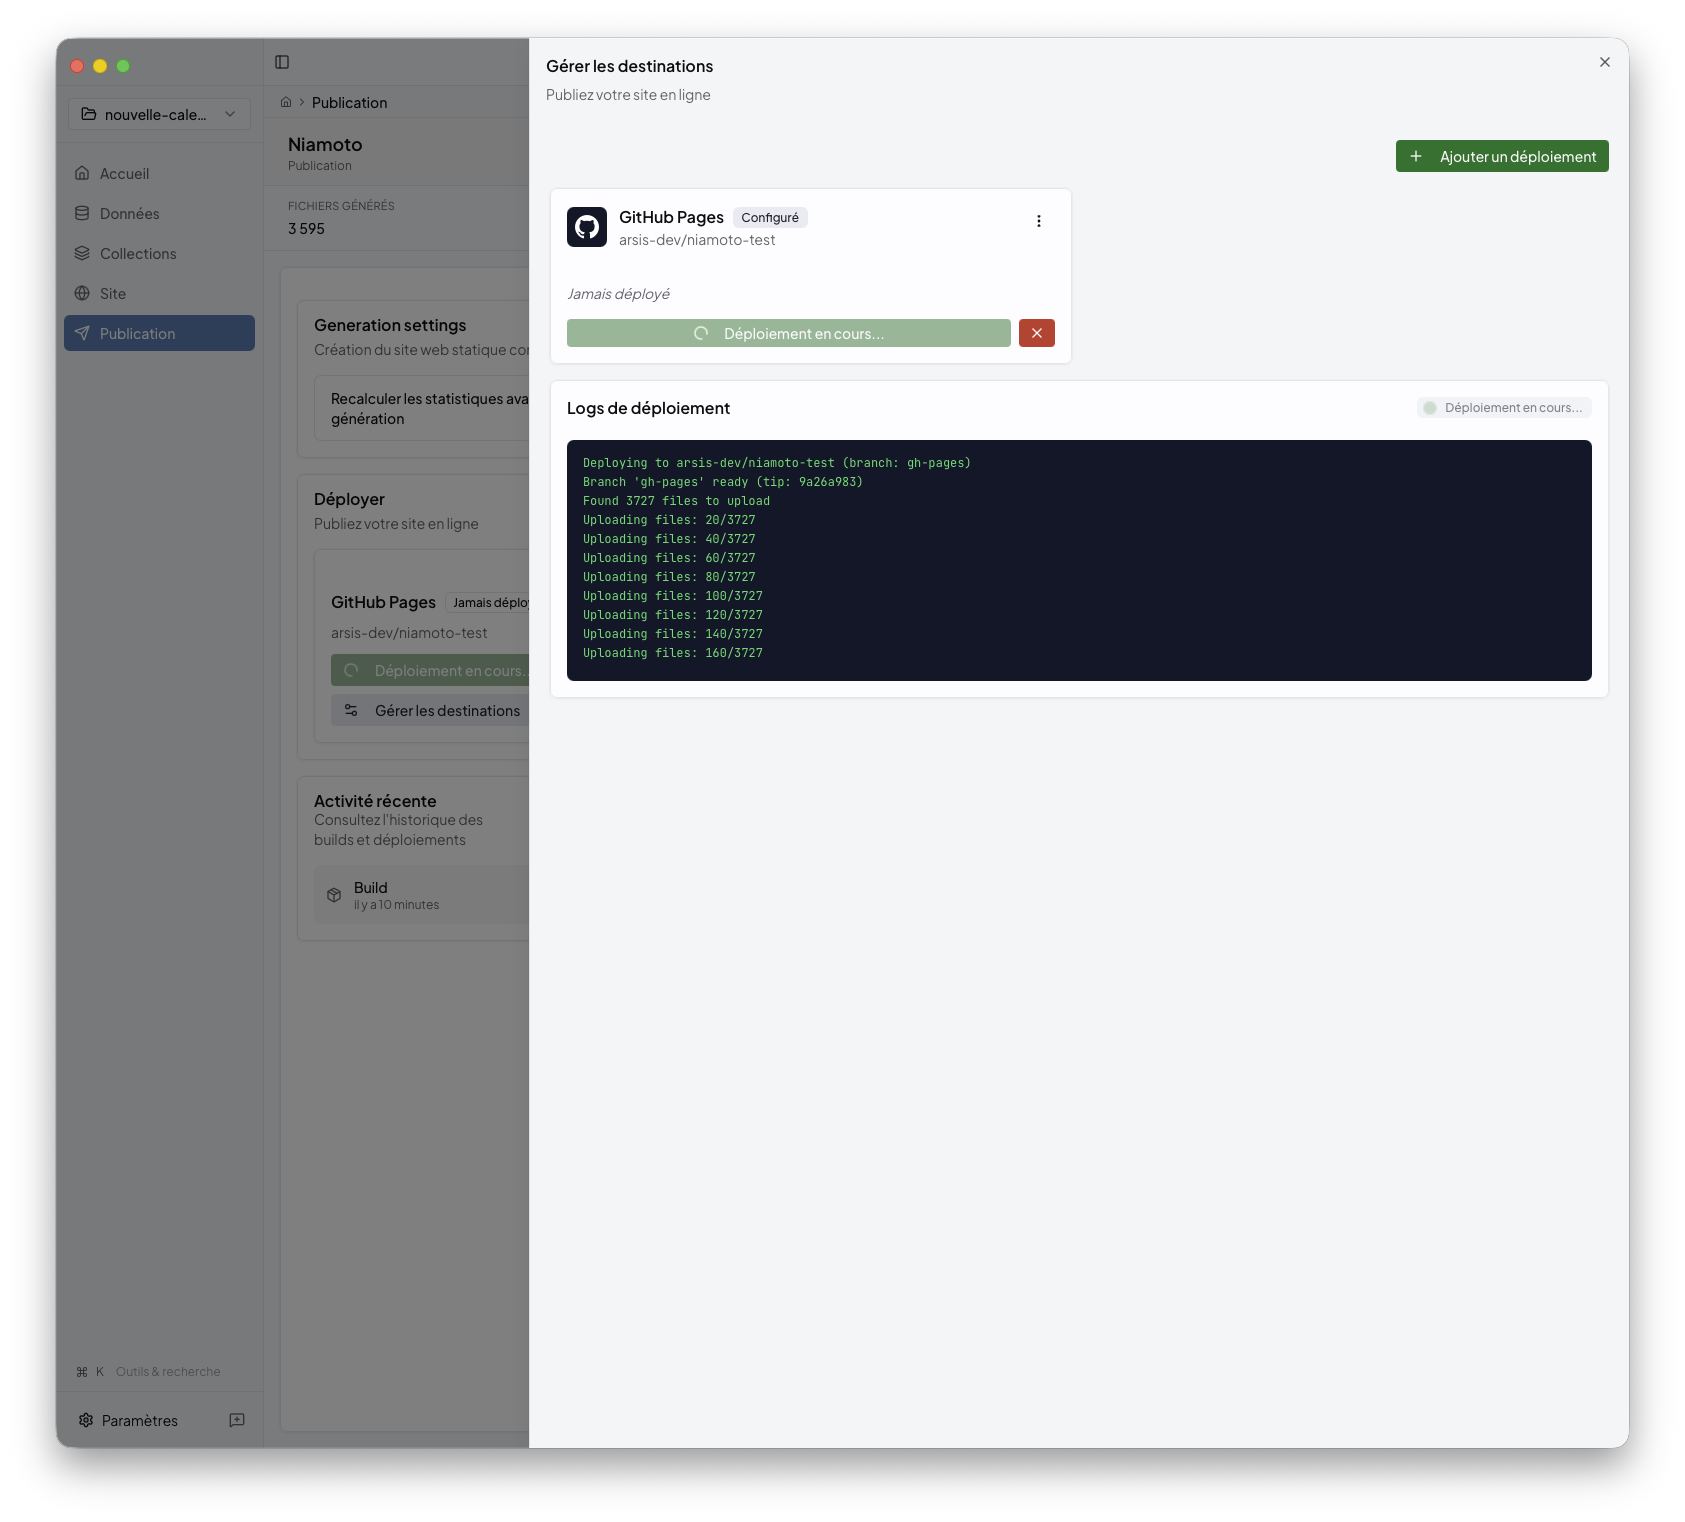
When the deployment finishes, the success state confirms that the generated portal was uploaded correctly.
Behind the UI
If you work directly with project files, the build side of this stage is mostly
driven by config/export.yml. In the desktop app, deployment settings are
managed from the UI, and credentials are stored through the OS keyring. For CLI
automation, config/deploy.yml can still provide deployment defaults.