Desktop App Tour
Use this section when you already have the desktop app installed and want the full UI path from project setup to publication.
If you want the quick version first, start with ../01-getting-started/first-project.md. This guide is the detailed follow-up.
Main path
1. Create or open a project
Start from the welcome screen, create a project, or reopen an existing one.
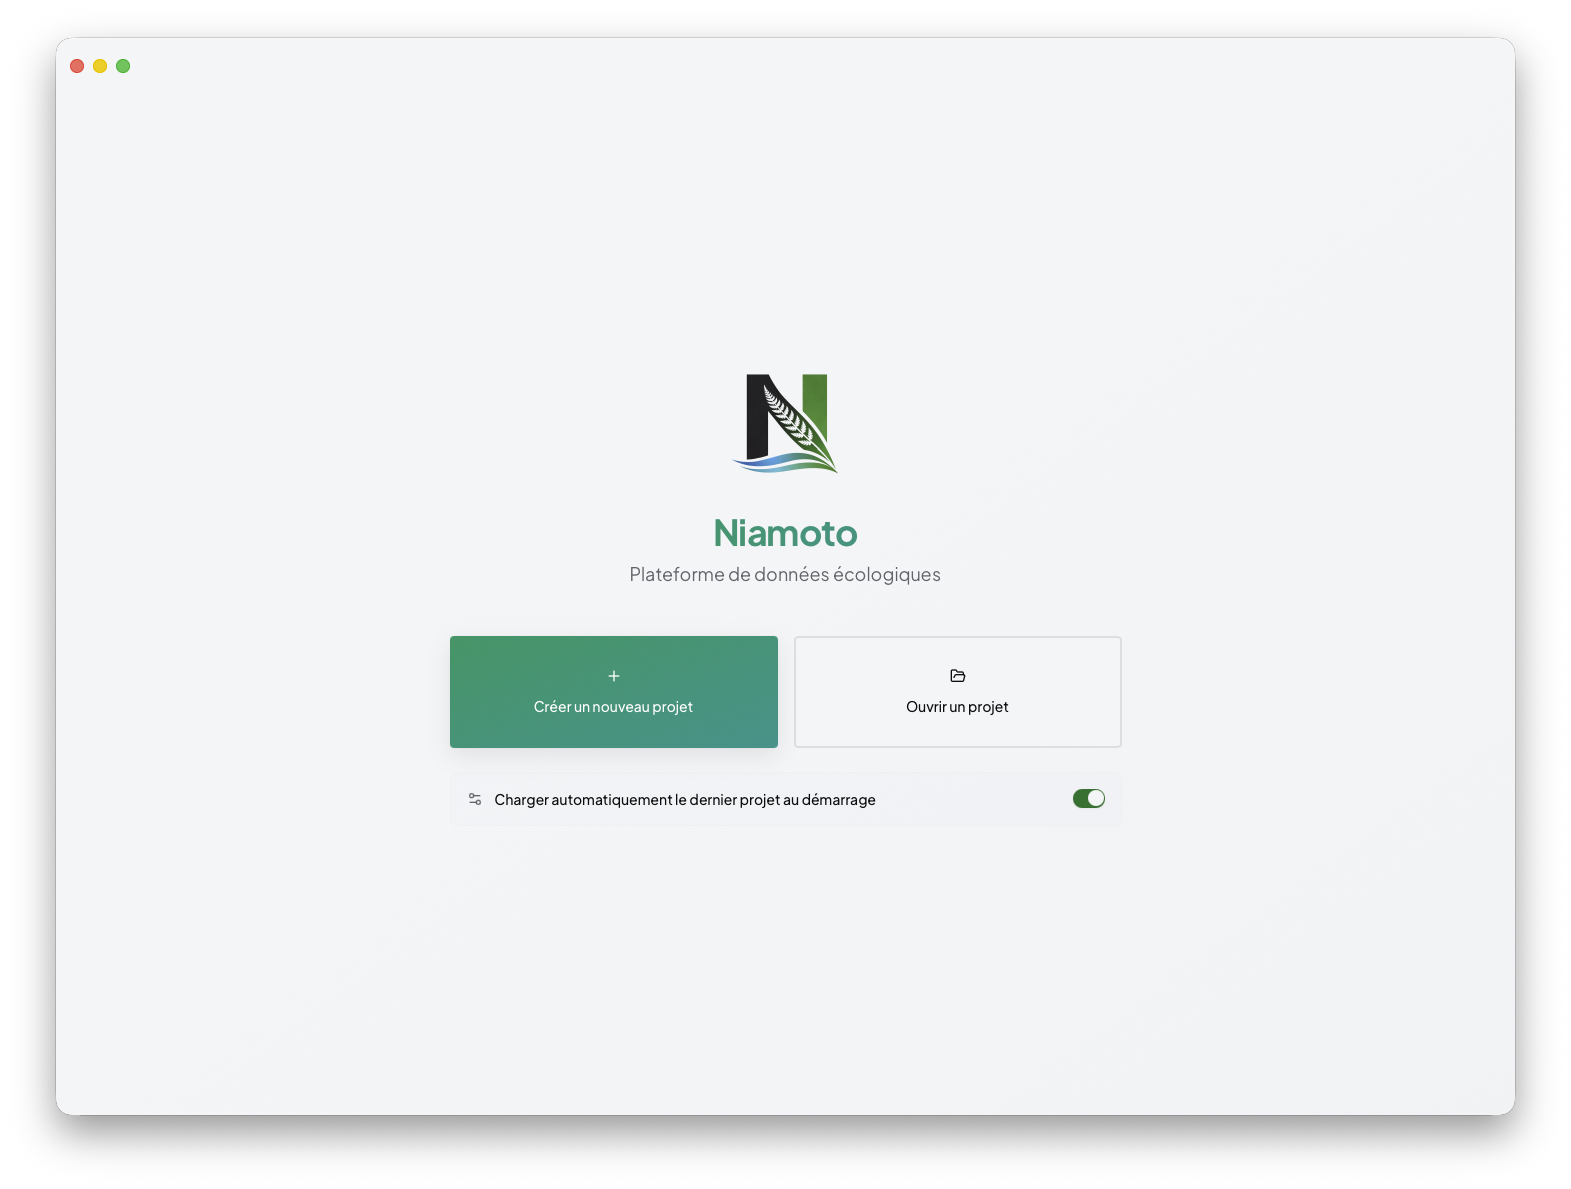
The detailed onboarding flow stays in ../01-getting-started/first-project.md. Once the project exists, the main desktop workflow is:
import sources
configure collections
build the site
publish the result
2. Import the project data
Import is where you add CSVs, spatial files, and rasters, let Niamoto detect their roles, then review the generated configuration before loading the data.
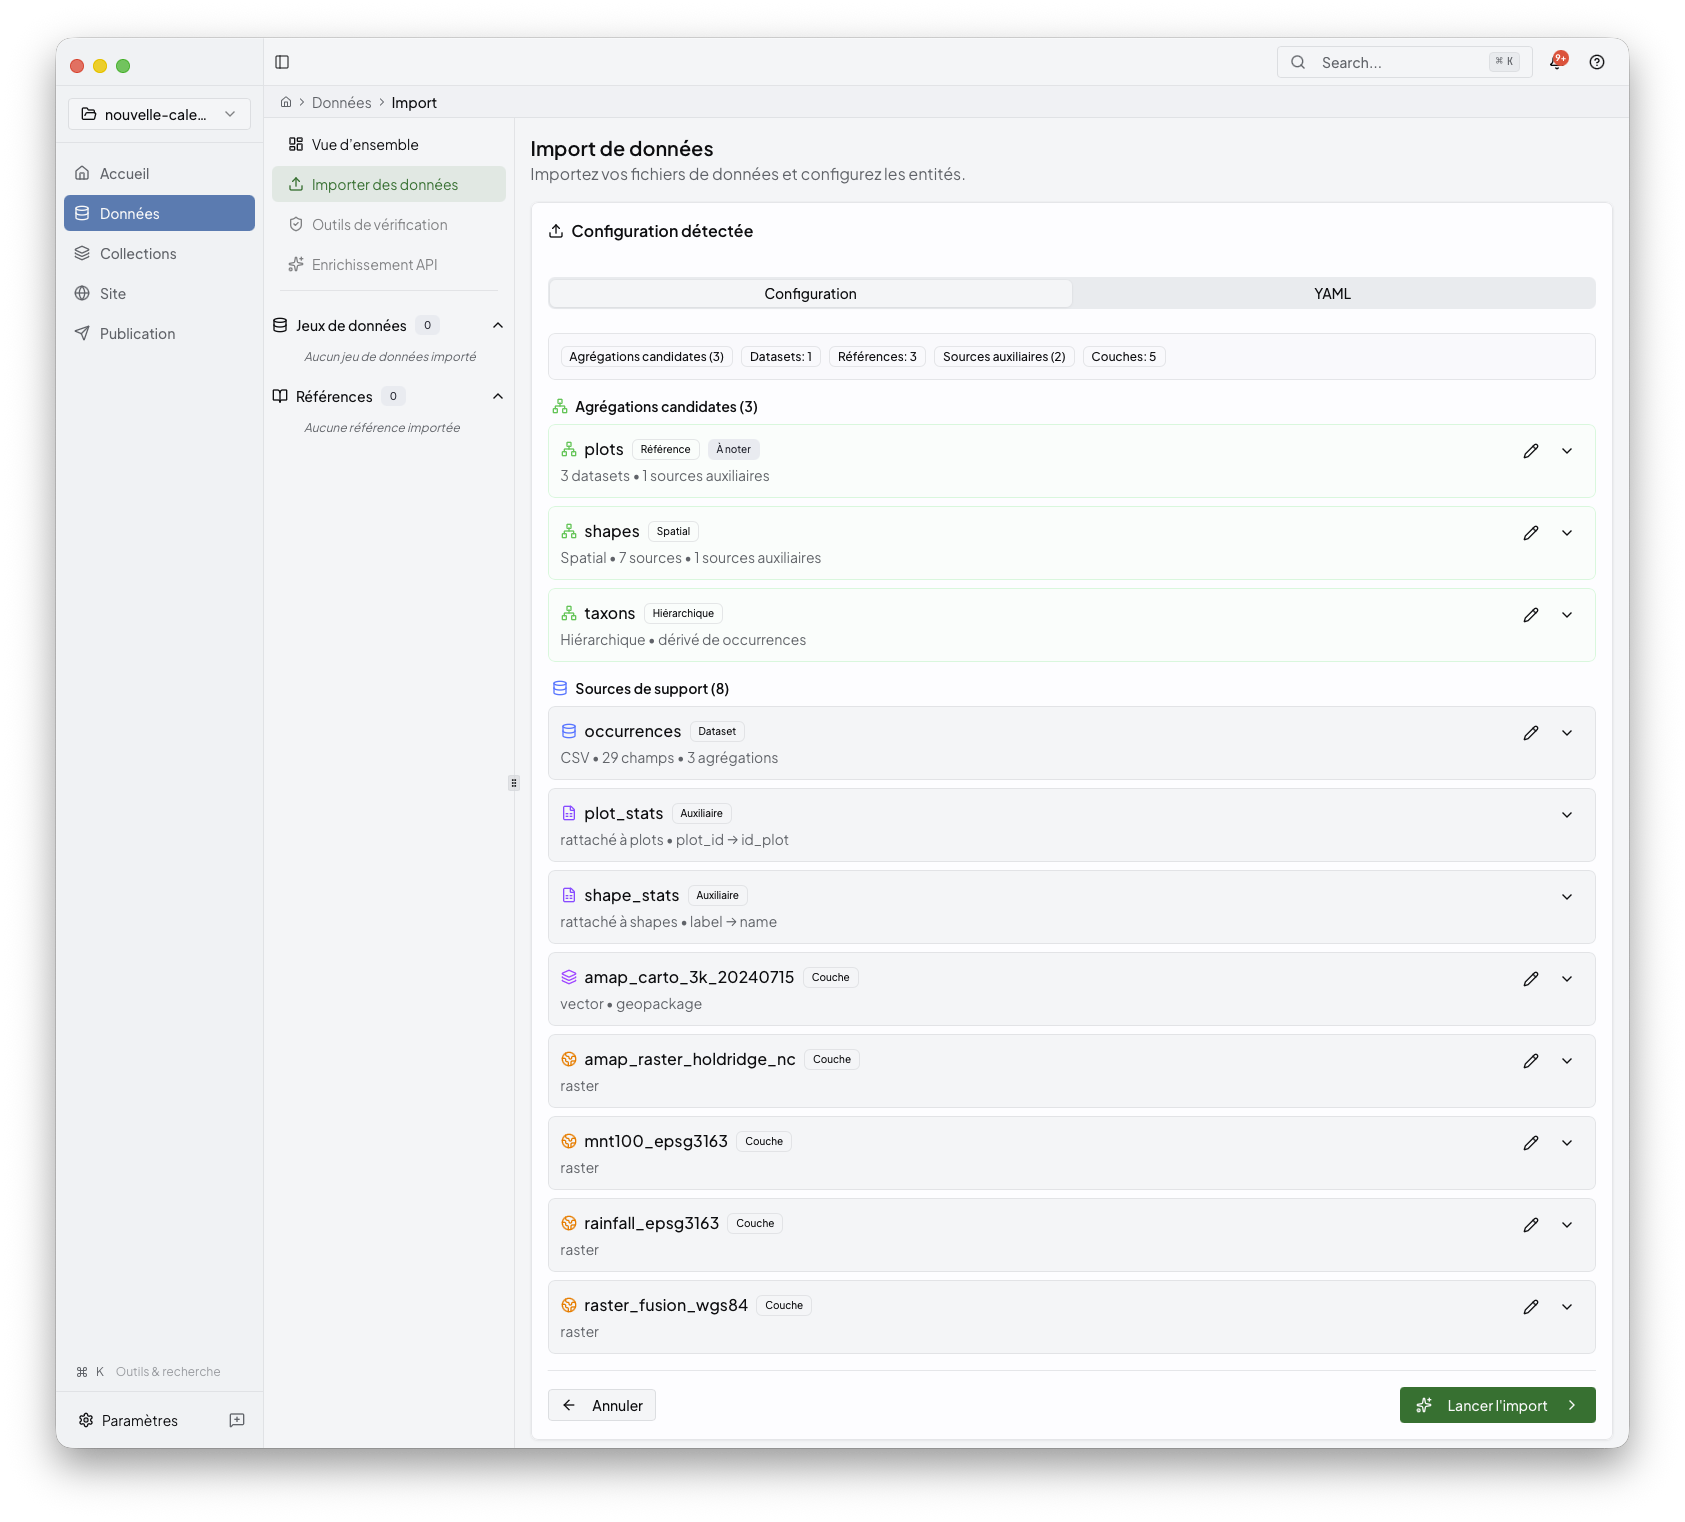
See import.md.
3. Configure collections
Collections is the reader-facing name for the stage backed by
config/transform.yml and the collection-facing parts of config/export.yml.
Use it to inspect grouped outputs, add widgets, and recompute collection
content.

See collections.md.
4. Build the site
The Site area is where you shape the generated portal: shared pages, collection pages, navigation, and appearance.

See site.md.
5. Publish the portal
Publish is the final desktop stage. Build the output, inspect the generated site preview, pick a deployment target, and review the result.
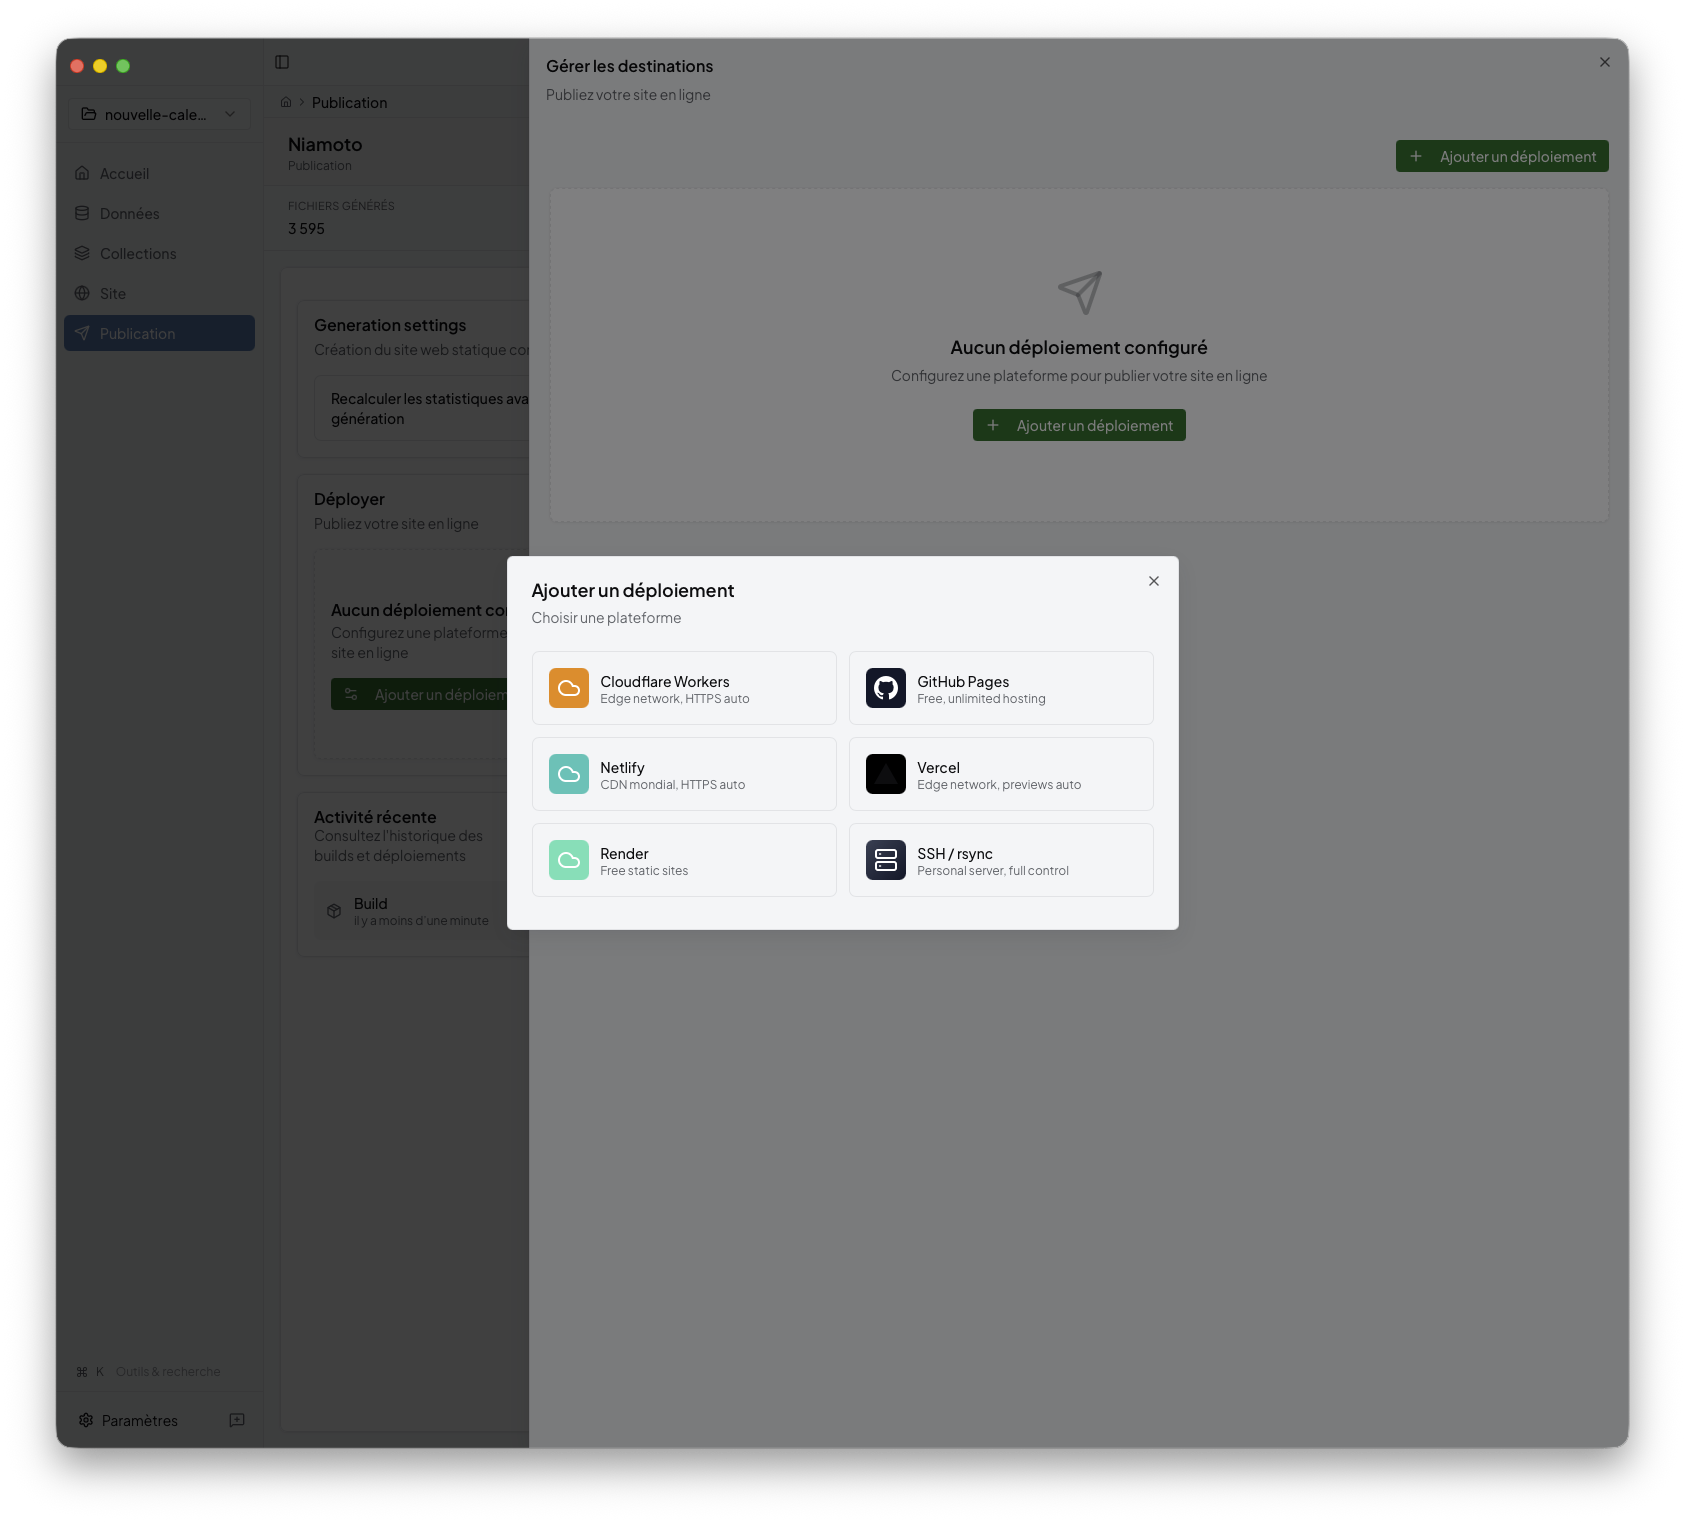
See publish.md.
Module pages
import.md: source files, auto-detection, config review, import execution
collections.md: collection outputs, widgets, recompute workflow
site.md: pages, navigation, appearance, site-builder workflow
publish.md: build preview, deployment targets, publish status
Supporting references
widget-catalogue.md: widget selection, index pages, API exports
preview.md: the three preview surfaces used across the desktop app
Other routes
Starting from scratch: ../01-getting-started/README.md
Running from a shell: ../03-cli-automation/README.md
Extending the product with plugins: ../04-plugin-development/README.md